

A new coil should taste clean and full from the first few puffs. If it tastes burnt straight away, the problem usually is not the e-liquid or the device – it is the setup. Knowing how to prime vape coils properly helps you avoid wasted coils, harsh hits and that dry, singed taste nobody wants.
Priming is simply making sure the cotton inside the coil is fully soaked before you fire it. Most burnt coils happen in the first few minutes because the wick has not had enough time to absorb e-liquid. The good news is that it is easy to get right, whether you use a pod kit, sub-ohm tank or standard starter vape.
How to prime vape coils the right way
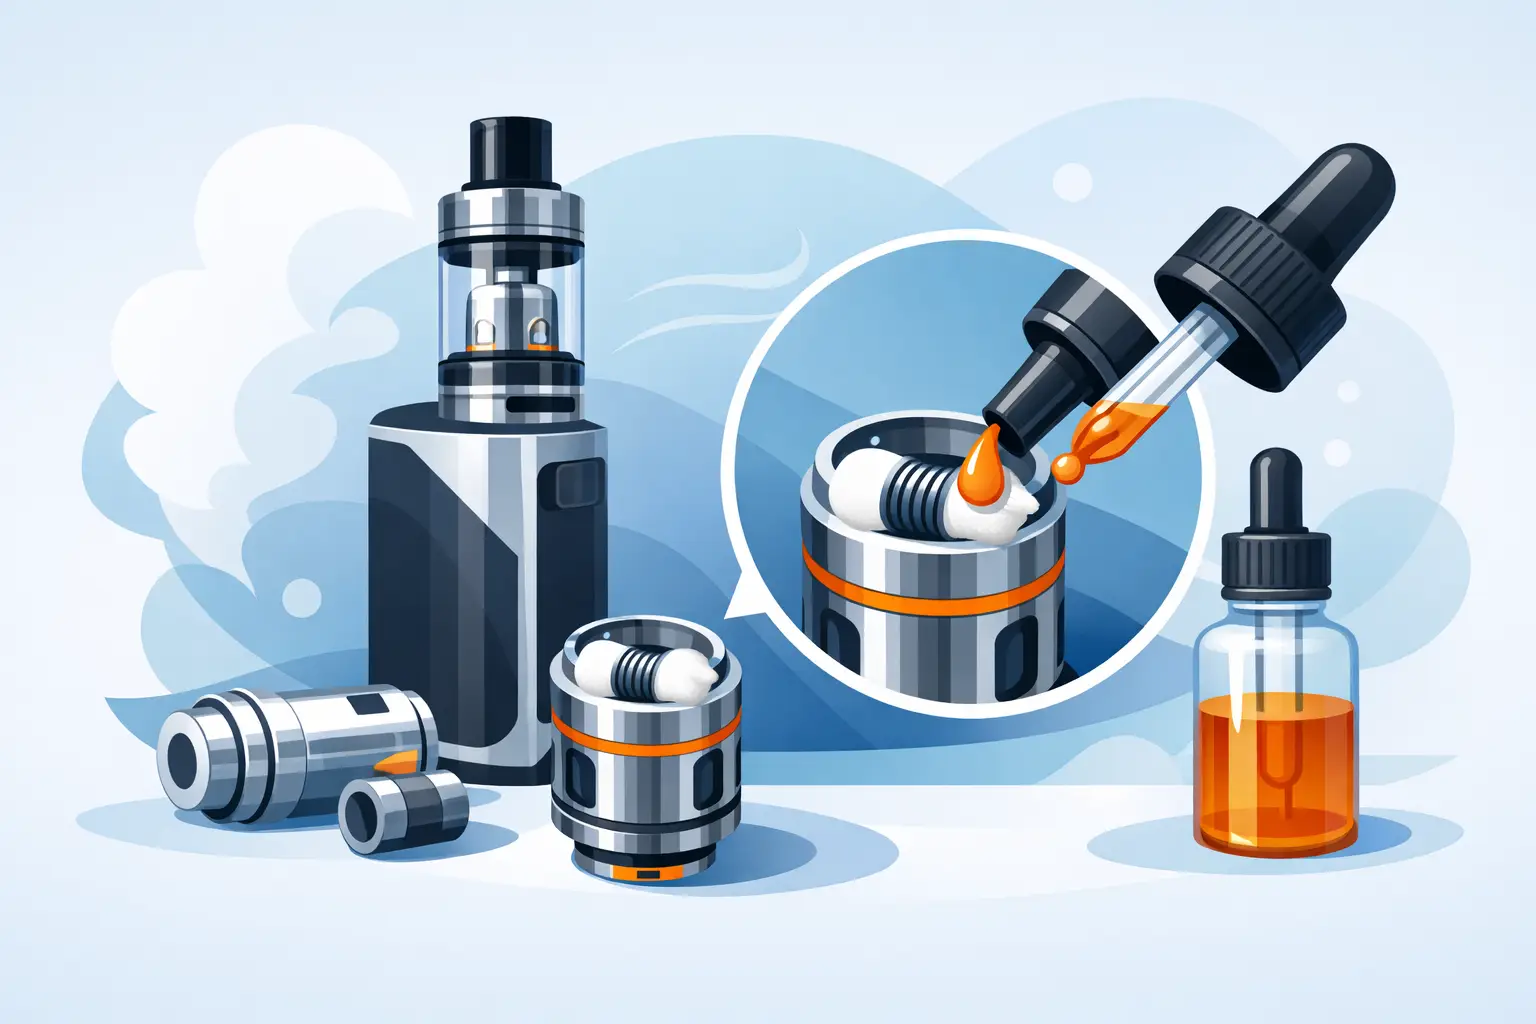
The basic method is straightforward. Add a few drops of e-liquid directly onto the exposed cotton openings on the coil, fill the tank or pod, then leave it to sit before vaping. That short wait matters more than most people think.
If your coil has visible cotton through the juice ports, place a drop or two onto each opening. If you can see cotton down the centre, add one small drop there as well, but do not flood it. You want the wick damp, not drowning.
Once the coil is fitted, fill your tank or pod as normal and leave it standing upright. For most coils, 5 to 10 minutes is enough. Thicker high-VG liquids may need a bit longer, especially with larger sub-ohm coils that hold more cotton.
Before taking a full puff, start gently. If your device has adjustable wattage, begin at the lower end of the coil’s recommended range. Take a few light puffs first rather than hitting it at full power. That gives the liquid more time to pull through the wick evenly.
Why priming matters
A coil is only as good as the wick inside it. When the cotton is dry and the device heats up, that dry cotton can scorch almost instantly. Once that happens, the taste often stays with the coil, even if you soak it afterwards.
Proper priming helps with three things. First, it protects the cotton from burning. Second, it improves flavour from the start. Third, it can help the coil last longer, which matters if you are buying replacements regularly and want better value from every pack.
This is especially useful if you are shopping on price and trying to keep vaping costs sensible. Burning through coils too quickly is an easy way to waste money.
Step-by-step: priming a new vape coil
If you want a clear routine you can repeat every time, keep it simple.
Start by removing the old coil and checking that the new one matches your tank or pod. A wrong fit can cause leaking, poor performance or no connection at all. Fit the new coil securely, but do not overtighten anything.
Next, look for the wick holes on the side of the coil. Add a small amount of e-liquid to each one. You are not trying to fill the whole coil manually. You are just giving the cotton a head start.
After that, fill the tank or pod with your chosen e-liquid. Assemble the device and let it stand. If you are using a smaller MTL coil with thinner 50/50 liquid, a short wait is usually fine. If you are using a sub-ohm coil with thicker liquid, give it more time.
When you are ready to vape, set the power low if your kit allows it. Take two or three small puffs. Then increase the wattage gradually until you reach your usual setting. That extra minute can save a coil.
How long should you leave a primed coil?
There is no single answer because it depends on the coil design and the e-liquid thickness. As a general rule, 5 to 10 minutes works for most everyday setups. Some larger mesh coils and high-VG liquids may benefit from 10 to 15 minutes.
If you are unsure, waiting longer is safer than rushing. A coil that has sat for an extra few minutes is unlikely to cause issues. A coil fired too early can be ruined before you have even broken it in.
Some users take a few draws on the mouthpiece without pressing the fire button. This can help pull liquid into the wick, although it is not essential on every device. If you do this, keep it gentle.
Common mistakes that ruin coils early
The biggest mistake is firing the device straight after filling it. This is the classic route to a burnt hit. It is quick, easy to do, and expensive if it keeps happening.
Another common issue is using too much power too soon. Even a properly primed coil can struggle if you jump straight to the top of the wattage range. New coils often perform better if you ease them in.
Chain vaping is another problem. If you take several long puffs back to back, the wick may not keep up, especially with sweet or thick e-liquids. That can dry out parts of the cotton and shorten coil life.
There is also over-priming. While under-priming is worse, pouring too much liquid directly into the centre of the coil can flood it. That may lead to gurgling, spitback or weak vapour at the start.
Does coil type change how you prime it?
Yes, a bit. The principle stays the same, but the details can vary.
Pod coils and smaller MTL coils usually need less liquid added directly because they contain less cotton. They also tend to work with thinner e-liquids, so they soak up faster. A few drops and a short rest is often enough.
Sub-ohm coils are larger, draw more liquid and often use thicker high-VG juice. These usually need a little more patience. Mesh coils can give excellent flavour, but they still need the cotton behind the mesh to be fully saturated before use.
Built-in pod coils, where the coil is fixed inside the pod, still need priming in practice even if you cannot drip liquid onto the cotton directly. In that case, fill the pod and leave it to soak thoroughly before the first use.
Signs your coil is primed and ready
You will not always see a dramatic change, but there are a few signs to look for. The cotton visible through the juice ports should appear darker and wet rather than bright white and dry. After resting, the tank should also feed liquid into the coil naturally.
On the first few puffs, the vapour should taste clean, not harsh. If flavour is muted for the first draw or two, that can be normal. If it tastes burnt or sharply dry, stop straight away. Continuing to fire it will usually make things worse.
If the coil gurgles heavily or spits liquid, you may have overdone the priming or flooded the centre. That is usually less serious than burning the wick, and it often clears after a few gentle puffs.
Getting more life from every coil
Priming is the first step, but not the only one. Keeping the tank topped up helps because a low liquid level can stop the wick feeding properly. Running a tank nearly dry is one of the easiest ways to damage a coil mid-use.
Choosing the right wattage matters too. Stay within the recommended range and do not assume more power means better flavour. Sometimes the sweet spot sits somewhere in the middle, where flavour is strong but the coil is not being pushed too hard.
Sweet e-liquids can also shorten coil life because they leave more residue on the heating element. That does not mean you need to avoid them, but it does mean your coil may need replacing sooner. If you use dessert or heavily sweetened flavours, expect a bit more wear.
For everyday users, a steady routine usually works best. Prime properly, let the coil soak, start on lower power and avoid chain vaping. It is simple, and it saves money over time.
When to replace the coil anyway
Even if you know exactly how to prime vape coils, they do not last forever. Once flavour drops off, vapour production weakens, or you notice a burnt or stale taste that does not go away, it is probably time for a fresh one.
Leaks and gurgling are not always signs of a dead coil, but if cleaning the tank and refitting everything does not sort it, the coil may be past its best. Heavy use, sweet liquids and higher wattages all wear coils out faster.
If you vape regularly, it makes sense to keep spare coils ready rather than waiting until one fails. It is one of those basics that saves hassle, especially if you prefer buying in one order with your e-liquid, pods or accessories.
A coil only gets one first use, so it is worth doing it properly. Give the wick time to soak, keep the power sensible and do not rush the first few puffs – your flavour, your throat and your wallet will all be better off for it.